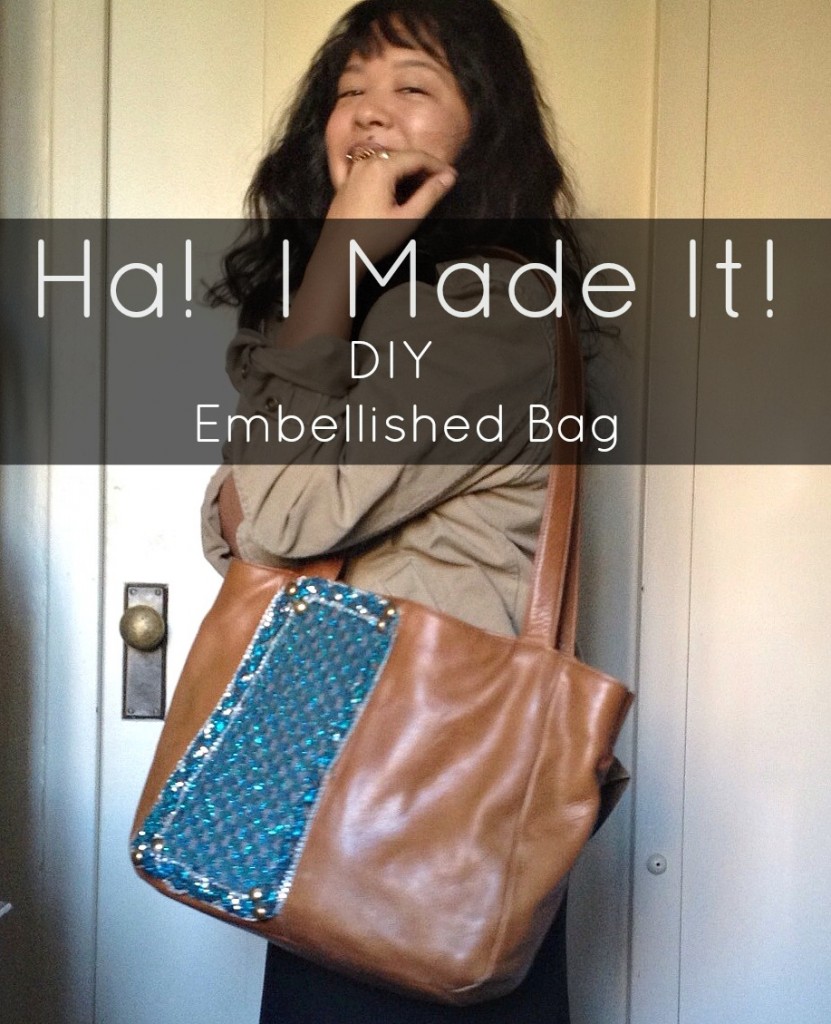
 So friends I bought this bag a couple of years ago at Goodwill and at the time I debated whether to purchase because clearly it lived a busy life. But the interior pocket situation and the sturdiness of this leather made it impossible to resist.
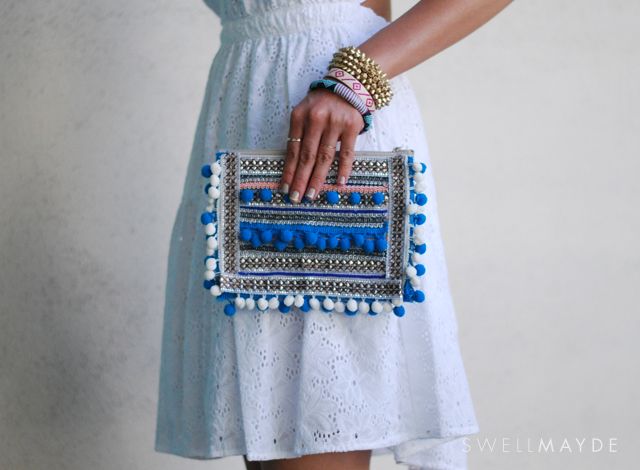
After a couple of years of having (and using!) my thrifted bag — trying to figure out what to do to give it a new life (p.s. I contemplated painting/dying leather…sigh, it’s totally complicated), I saw this post on SWELLMAYDE and thought AH HA!
(image source Swellmayde)
Obviously HUGE differences between my embellished bag and this gorgeous clutch. But I loved the sparkle and bright colors and exotic feel and I thought I could tooootally adapt this method to my gem of a bag! So I embellished…just a bit ( 🙂 ), inspired by this AMAZING diyer, really you MUST read SWELLMAYDE she’s great!
Supplies
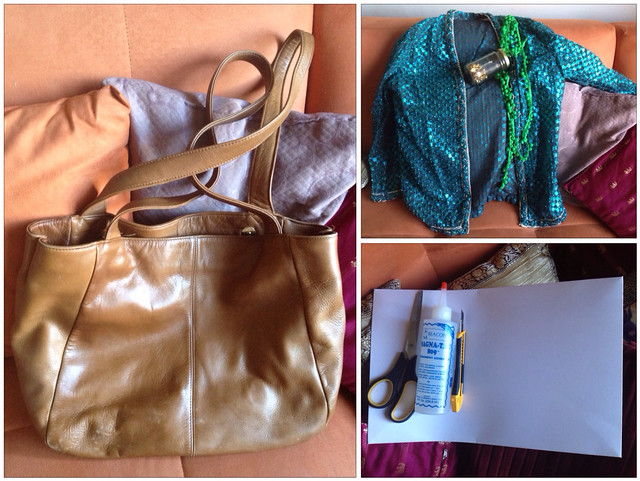
- Beat up bag via Goodwill
- Embellishments: thrifted sparkly jacket, second hand studs, and the pom poms which are pictured but I ended up not using. I LOVE pom poms, but it didn’t feel right on this bag.
- Sturdy glue- I used Magna Tac 809
- Scissor
- Straight blade
- Thin cardboard: Mine is from a used gift box.
Let’s Make It!
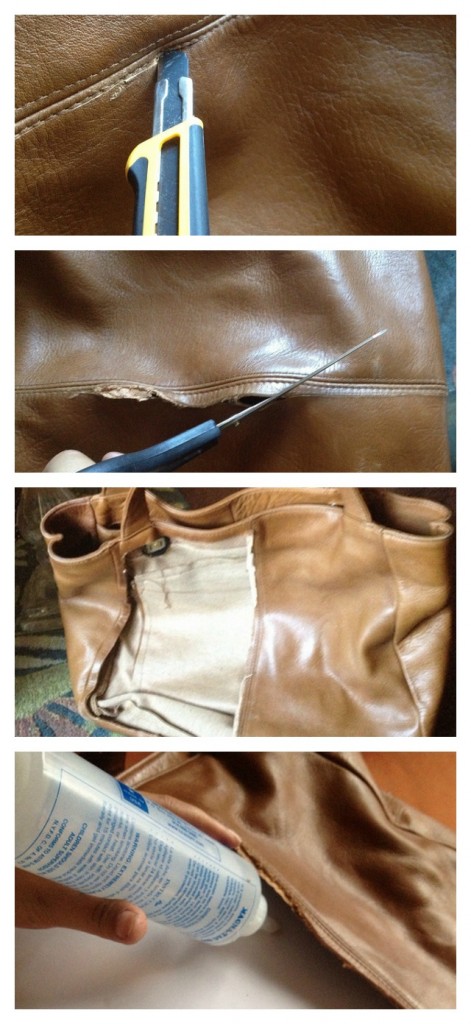
- Poke hole in your bag with your straight blade- I didn’t have to outline an area because the borders are really defined on the bag, but if you don’t have that on your bag, you will want to get a ruler and outline your cutout.
- Take your scissors to the whole and cut, snip, cut the piece away.
- You’ll end up with a whole like this.
- Glue the piece of cardboard into your bag. This gives your embellishment something to stick to.
- EMBELLISH!
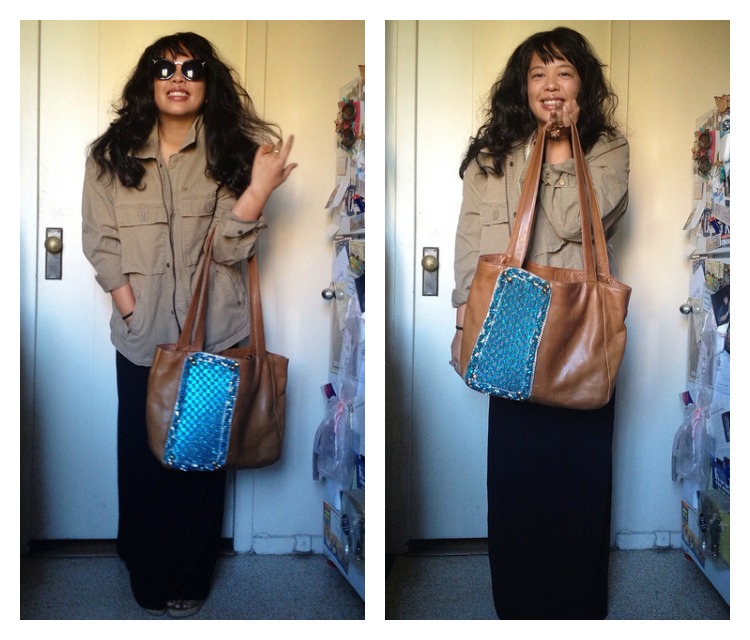
HA! You Made It!
(jacket-thrifted via goodwill; dress-future:standard available HERE ; blouse (not seen)-threads for thought; shoes-thrifted via buffalo exchange)
I absolutely love it! I’m debating on whether to add another panel. I totally dig the asymmetry of the one side, but I love the sparkle! Time will tell if I decide to add more…
P.S -I had a teeny weeny bit of heartache cutting up the sparkly jacket. It’s literally made out of something like tinsel for clothing…or maybe actual tinsel, who knows! But it never looked right on me and I tried to sell it on Etsy with no luck. I couldn’t let it part without knowing someone would love it! But now I love it in bag form :).



You are so brave! I could never cut any of my purses (lol)! But I think the results are nice and totally you!
Great job girl! I am probably the worst DIYer ever so I don’t think I should try this haha but maybe if I find a cheap enough, beat-up-enough bag! 😉
THE-LOUDMOUTH recently posted..Look :: Packing for Austin
Oh man I’d be scared to cut up the jacket AND the bag! lol Great way to give new life to a bag 🙂
Kimberlee recently posted..My October Julep Maven Box